
Creating a Prescripted DropTool
This is the simplest form of DropTool: a control that has all of its scripts inside itself, and doesn't require any behaviors or libraries. It may include require support resources, such as images.
What is the Advantage to Using a Prescripted Control?
The main advantage for prescripted controls is that they are self-contained so you can copy and paste them from one stack to another and not have to worry about any dependent objects.
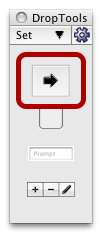
The DropTool in this example is a "Next" button, with an icon of an arrow pointing to the right. It will use an image (ID 486) from the "MetaCard Compatible" icon set in LiveCode.
| It looks like this: | And has this simple script: |

|
on mouseUpgo next cardend mouseUp
|
To make the DropTool, take the following mandatory steps:
- Open the DropTool Template.livecodestack.
- Copy and paste the button from your stack onto the DropTool Template stack. (If you hadn't already created it, you can create it from scratch on the first card of the DropTool Template stack.)
- Since custom controls must be in a group, make sure your button is selected and then group it (adjust the margins of the group if you like).
- Give your control group the name "NextButton"(this is its DropTool "type").
- Change the name of the stack from "DropTool Template" to "NextButton"(same as your control). (You can change the title as well if you like.)
- Change the values in the uRIPcustom property set for the stack to correspond to your own "about" information, or delete the custom property set in its entirety if you don't want to provide any "about" info.
(NOTE: You need to do this because the DropTool Template stack comes with a set of properties to show a simple About Box, and if you don't modify or delete them, the user will see the DropTool Template's "about" info when they try to get info on your control.)
Since the DropTools Palette works with your control based on the name you gave the group, and since you changed the name from what it was, you can leave the About and Inspector substacks alone and they will be ignored. However if you want to make the stack "clean", take the following additional steps:
- Delete the instructions field and the "DropTool Template Class" button (since your control is prescripted).
- Delete the "About DropTool Template" and "DropTool Template Inspector" substacks.
Finally, do File > Save as... and give your stack a new name and save it in the DropTools folder (for this example, I'll use "NextButton.livecode"). Note that the name of the file itself can be anything you want, and is only used for identification in the file system and for determining the order that individual DropTool stacks are listed in the DropTools Palette. Palette.
Close the stack in LiveCode, and then open the DropTools Palette (or close and reopen it) and you should see an icon for your control in the palette, which was automatically created by the DropTools Palette:
Drag and drop it to a stack and test it out!
Adding a Custom Icon
The icon that was automatically generated is OK, but you add your own custom icon:
- Reopen the "NextButton.livecode" stack.
- Import an image onto the card to use as an icon. Set the name of the image to
- Save and quit your stack and then close and reopen the DropTools palette.